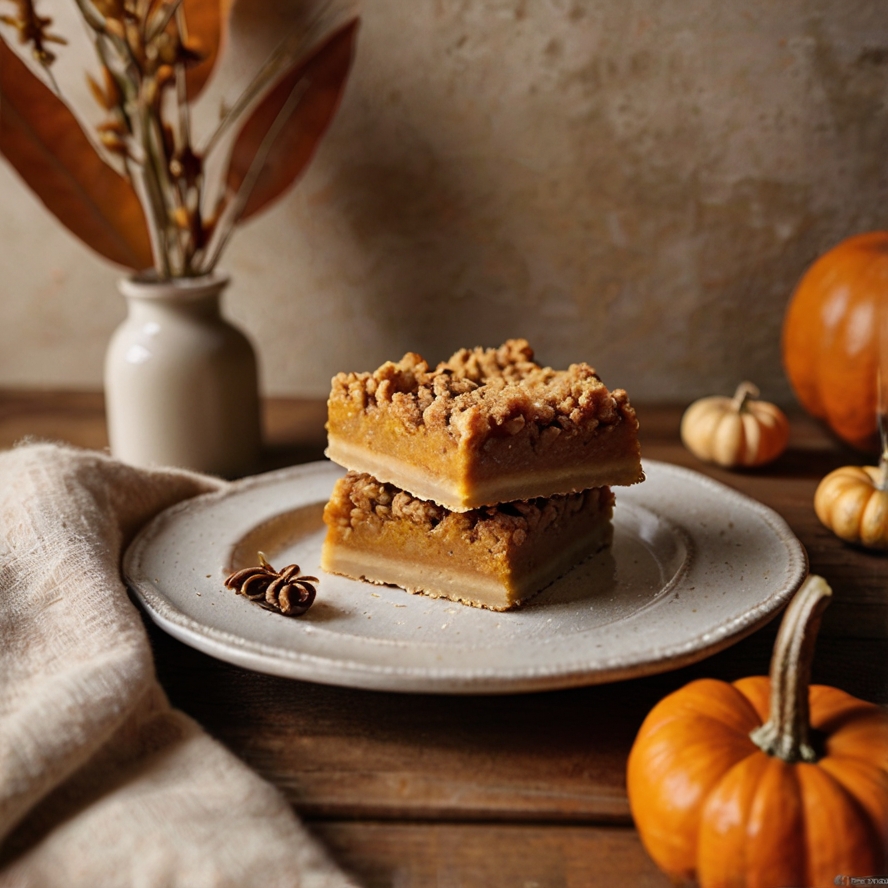
Simple Pumpkin Pie Crumble Bars smell like autumn hugged your kitchen and refused to leave. The kind of dessert that doesn’t shout—just whispers, “Stay a little longer.” You can taste the holidays even if it’s mid-October and still warm enough for sandals. There’s something old-fashioned about them, something you’d expect to cool on your grandmother’s counter next to a pie that never stood a chance of surviving till dinner.
Simple Pumpkin Pie Crumble Bars are not your average fall treat. They’re the glorious in-between of a pumpkin pie and a buttery crumble, all wrapped into neat little squares. Perfect for family dinner nights when you want the cozy comfort of pie but the casual hand-held ease of a bar. They slice clean, taste like home, and—trust me—they vanish faster than you can say, “Save me one.”
Ingredients & Substitutions
Simple Pumpkin Pie Crumble Bars start with simple, honest ingredients that do their job right. The crust and crumble share the same buttery base—saves time, saves dishes, saves your sanity.
For the crust & crumble:
- 1 cup unsalted butter, melted (don’t use salted here, it’ll throw things off)
- 2 cups all-purpose flour
- 1 cup old-fashioned oats
- 1 cup light brown sugar, packed tight
- 1 teaspoon baking powder
- ½ teaspoon salt
- 1 teaspoon ground cinnamon
For the pumpkin filling:
- 1 (15-ounce) can pure pumpkin purée (not pumpkin pie mix—don’t fall for that trap)
- ¾ cup granulated sugar
- 2 large eggs
- 1 cup evaporated milk
- 1 teaspoon vanilla extract
- 1 ½ teaspoons pumpkin pie spice (or make your own: cinnamon, ginger, nutmeg, clove)
Optional but encouraged:
- ½ cup chopped pecans or walnuts for a toasty crunch
- A sprinkle of flaky sea salt before baking for contrast
If you’re going gluten-free, swap the flour for a high-quality 1:1 gluten-free baking blend. It won’t crumble apart like sad sand if you let it cool fully before cutting. For dairy-free, use coconut oil or vegan butter—though, fair warning, it’ll taste a tad sweeter and more tropical.
When it comes to the pumpkin, canned puree is perfectly fine—actually, preferred. Fresh pumpkin purée sounds fancy, but it often turns watery and unpredictable. Consistency is the name of the game here.
Step-by-Step Instructions
Simple Pumpkin Pie Crumble Bars reward patience. And a little bit of mess. Let’s walk through it like we’re in the kitchen together, apron half-tied, oven preheating to 350°F.
Step 1: Prepare the crust & crumble.
In a big bowl, combine flour, oats, brown sugar, baking powder, cinnamon, and salt. Pour in melted butter and mix until it looks like rough, damp sand. You want clumps—those golden nuggets are what make the crumble irresistible.
Reserve about 1 ½ cups of this mixture for the topping. The rest gets pressed firmly into a parchment-lined 9×13-inch baking pan. Don’t rush this. Press evenly, corners too, or it’ll bake up uneven.
Step 2: Bake the base.
Pop the pan into the oven for 15 minutes, just to set it. You’ll see the edges puff and lightly brown. That’s your cue.
Step 3: Make the filling.
While that base is baking, whisk pumpkin purée, sugar, eggs, evaporated milk, vanilla, and pumpkin pie spice until smooth. It should look creamy and smell like heaven’s latte.
Step 4: Assemble.
Pour the filling right over the warm crust—don’t cool it, the heat helps bind the layers. Sprinkle the reserved crumble evenly on top. If you’re using nuts, now’s the time to toss them on too.
Step 5: Bake again.
Slide it back in for another 40–45 minutes, until the center is set and the crumble turns golden brown. You’ll know it’s ready when it jiggles slightly, like firm Jell-O, not soup.
Step 6: Cool and slice.
This part’s tough. You have to let it cool completely—two hours minimum. If you cut it too early, it’ll collapse into a soft, pumpkiny puddle. Once cooled, slice into bars and marvel at your work.
A little secret? They taste even better chilled the next day. Something magical happens overnight; the flavors settle and deepen.
Cooking Techniques & Science
Simple Pumpkin Pie Crumble Bars depend on balance. The crust-crumble layer pulls double duty—structural support and texture contrast. Using melted butter instead of cold butter changes everything; it gives you a denser, more cohesive base, almost cookie-like. Cold butter would make it flakier, but here we need stability.
The oats? They’re not just filler. They absorb moisture from the pumpkin layer and stop the bottom from getting soggy. Old-fashioned oats are key; instant ones turn to mush before you blink.
The pumpkin filling thickens as it bakes thanks to eggs and evaporated milk. Eggs provide structure, while the milk adds creaminess without watering it down. The sugar not only sweetens—it affects texture by tenderizing the proteins in the eggs.
The baking temperature matters too. Too hot, and the crust over-browns before the filling sets. Too cool, and you’ll end up with a wet center. 350°F is the goldilocks zone for this one—steady, predictable heat that caramelizes the top just enough.
Don’t underestimate cooling time either. It’s not optional. Cooling lets the filling firm up through residual heat and starch retrogradation—yes, that’s a real thing. Cut it too soon, and all that delicate binding between crust and custard just collapses.
A metal pan gives you a crispier bottom; glass pans insulate, so they take longer and yield softer crusts. Choose your adventure.
Serving & Pairing Suggestions
Simple Pumpkin Pie Crumble Bars are already a show-stealer, but let’s take it up a notch. Serve them slightly warm with a scoop of vanilla bean ice cream melting lazily over the top. Or go the other route—chilled straight from the fridge, firm and fudgy, with whipped cream and a dusting of cinnamon.
If you’re hosting a family dinner night, these bars pair beautifully with hot apple cider, spiced chai, or even a good espresso. The deep pumpkin flavor loves bold, warm spices in drinks. For something fancier, try serving with a drizzle of caramel sauce or maple glaze.
For plating, keep it rustic. Stack them on a wooden board lined with parchment, maybe a few cinnamon sticks scattered around. No one trusts a dessert that looks too perfect—it’s the crumbly edges that make people smile.
They also make excellent leftovers—just store them in an airtight container in the fridge for up to 5 days. Reheat for 15 seconds in the microwave, and that buttery aroma will bring everyone running again.
And if by some miracle you have extras, crumble them over vanilla yogurt or oatmeal in the morning. Breakfast dessert is a thing, I swear.
Conclusion
Simple Pumpkin Pie Crumble Bars hit that sweet spot between nostalgia and practicality. They give you all the silky warmth of pumpkin pie without the pie drama—no rolling, no cracking, no soggy crust. Just layers of buttery crumble and creamy pumpkin that feel like fall in a bite.
They’re simple enough for weeknights yet special enough for Thanksgiving dessert tables. The recipe’s forgiving too—tweak spices, add nuts, use brown butter if you’re feeling fancy. Once you make them, you’ll start looking for excuses to make them again.
And here’s the truth: food like this isn’t just about eating. It’s about gathering. Talking. Laughing over crumbs and stories. That’s the kind of dessert worth baking.
FAQs
Can I make Pumpkin Pie Crumble Bars ahead of time?
Absolutely. They actually taste better a day later. The flavors deepen, and the texture sets beautifully. Just store them in the fridge, covered, and bring to room temp before serving.
Can I freeze Pumpkin Pie Crumble Bars?
Yep! Slice them first, then freeze on a tray until solid. After that, wrap individually and store in a freezer bag. Thaw overnight in the fridge before serving.
Can I use fresh pumpkin purée instead of canned?
You can, but be cautious. Fresh purée holds more water and can make the filling too soft. If using it, strain through cheesecloth to remove excess liquid.
Why did my crumble turn soggy?
Usually, it’s either too little baking time or cutting while still warm. Make sure it’s baked till the top is golden and let it cool fully before slicing. Patience really is the secret ingredient here.
Can I make this dairy-free or vegan?
Yes—use coconut milk instead of evaporated milk and flax eggs instead of real eggs. Vegan butter or coconut oil works for the crust. It changes the flavor a bit but still tastes amazing.

Olivia P. is a seasoned food blogger at Tastywink, sharing delicious, easy-to-follow recipes inspired by him passion for home cooking. With years of culinary blogging experience, he brings flavor, creativity, and a personal touch to every dish.