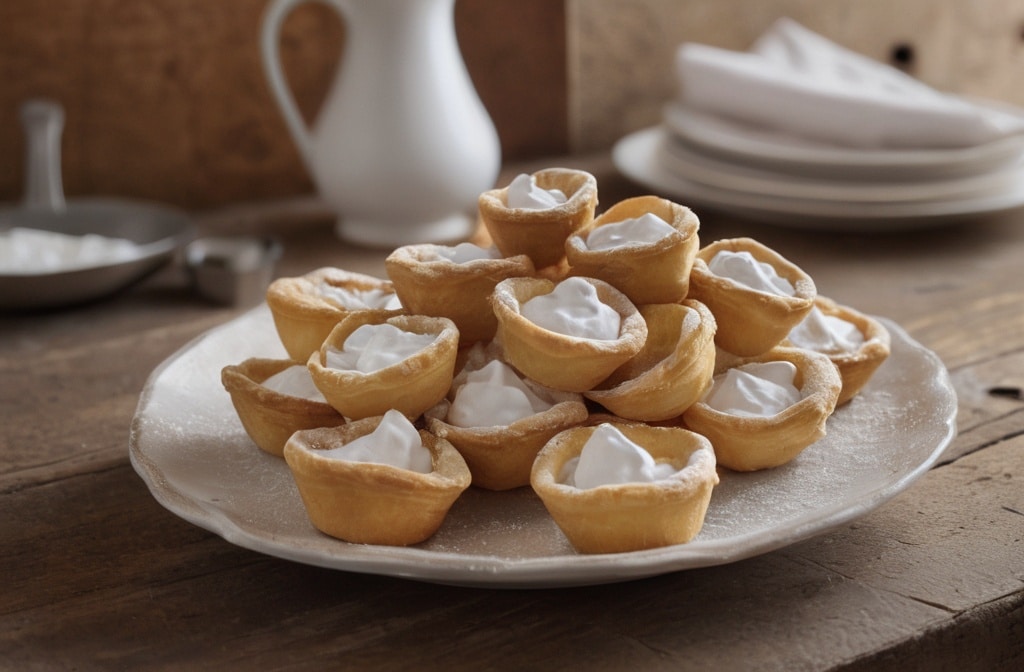
Mini Cannoli Cups. I still remember the first time I brought a tray of these to a family wedding. A hundred-dollar cake on the table, but folks were sneaking these little guys into napkins like diamonds. Grandma swore they were better than her Sicilian cannoli. (I didn’t argue—I like living.)
Mini Cannoli Cups are bite-sized versions of the classic Italian cannoli, served in crisp pastry shells and filled with creamy ricotta filling. But the magic? No need to deep-fry a single thing. These are baked, simple, and honestly, a pastry chef’s secret weapon for speed and flair.
Mini Cannoli Cups carry all the flavour of traditional cannoli with none of the fuss. Plus, they’re easy to prep ahead, hold well, and can be dressed up like runway models at a Milan show.
Ingredients & Substitutions
Mini Cannoli Cups start with two parts: the shells and the filling. Let’s talk shell first.
- 1 package refrigerated pie crusts (2 crusts total) — store-bought works, but homemade is fine if you hate sleep.
- Butter for brushing — salted or unsalted, doesn’t matter much here.
- Cinnamon sugar (¼ cup sugar + 1 tsp cinnamon) — gives a little sparkle and crunch.
Mini Cannoli Cups filling deserves some love and fuss. That’s where all the flavour sits.
- 1½ cups whole milk ricotta — the soul of a cannoli. Don’t use low-fat, it’s watery and sad.
- ½ cup mascarpone cheese — silky, rich, and slightly tangy. If unavailable, full-fat cream cheese works, but not as delicate.
- ⅓ cup powdered sugar — sifted. Unsifted sugar leaves you with lumpy heartbreak.
- ¼ tsp ground cinnamon — just a whisper, don’t overdo it.
- 1 tsp pure vanilla extract — use the real deal or go home.
- Mini chocolate chips (optional but c’mon…) — ¼ cup or more if you’ve had a day.
Mini Cannoli Cups also love to be customised.
Allergy to dairy? Try cashew-based ricotta and vegan mascarpone. Avoiding gluten? Use gluten-free pie dough (though the texture’s never quite the same). No mascarpone? Sour cream in small doses can pinch-hit, but watch the tang.

Step-by-Step Instructions
Mini Cannoli Cups shells get made first. Preheat your oven to 425°F (218°C). Grab a mini muffin tin and lightly grease it. Butter is best—it adds flavor. Nonstick spray works, but it’s boring.
Mini Cannoli Cups start with your pie dough. Roll it out a smidge thinner than it comes—about ⅛ inch. Too thick and the cups taste like a biscuit. Use a round cutter (about 2.5 inches) and cut circles. Press each into the muffin cups, gently. Don’t stretch them or they’ll shrink like your favorite jeans in the dryer.
Mini Cannoli Cups get brushed with melted butter, then sprinkled with cinnamon sugar. Bake 10–12 mins or until golden. If the bottoms puff, press ’em down gently with the back of a spoon after baking.
Mini Cannoli Cups need to cool completely. Otherwise, your filling turns into a sloppy mess. Be patient. Eat a cookie or something.
Mini Cannoli Cups filling comes next. Drain ricotta if it’s watery—wrap in cheesecloth and squeeze, or use a fine-mesh strainer for a few hours. Dry ricotta equals creamy dreams.
Mini Cannoli Cups filling gets whipped. In a bowl, combine ricotta, mascarpone, sugar, cinnamon, and vanilla. Beat until smooth—about 2 minutes. Stir in mini chips if you’re feeling fun. Refrigerate for at least 30 minutes. It firms up and pipes like a dream.
Mini Cannoli Cups get filled just before serving. Use a piping bag with a star tip (or a zip-top bag snipped at the corner if you’re a rebel). Fill each shell generously. Don’t skimp. Cannoli aren’t a diet food.
Mini Cannoli Cups can be dusted with extra powdered sugar, chocolate drizzle, crushed pistachios—whatever vibe you’re going for.
Cooking Techniques & Science
Mini Cannoli Cups benefit from oven-baking instead of deep-frying. Why? Less mess, fewer tears, and a shell that holds up longer at room temp.
Mini Cannoli Cups rely on butter-brushing and sugar-dusting to mimic that crispy, golden cannoli crust. It’s not the same as the shattering crunch of fried dough, but it’s crisp, flaky, and miles better than a soggy tart.
Mini Cannoli Cups filling science? Ricotta and mascarpone both have high moisture content. That’s why you must drain ricotta and chill the filling—it stops your shells from turning into damp cardboard. Always fill just before serving.
Mini Cannoli Cups use pie crust as a shortcut, but phyllo dough works if you’re in the mood for stress and ten thousand buttery layers. Not recommended unless you’ve got time and an apron you don’t love.
Mini Cannoli Cups: tools that matter? A mini muffin tin with a nonstick coating and a decent hand mixer for whipping the filling. Don’t try doing this with a spoon unless you want carpal tunnel.
Serving & Pairing Suggestions
Mini Cannoli Cups look stunning with a little flair. Dust with powdered sugar like snowflakes. Add candied orange peel on top for a Sicilian nod. Pipe in a swirl—don’t plop the filling in like mashed potatoes. You’re better than that.
Mini Cannoli Cups pair gorgeously with espresso, cappuccino, or even a spiked affogato. For parties, offer them alongside limoncello or Vin Santo—something sweet, light, and Italian.
Mini Cannoli Cups also make a killer addition to dessert boards. Arrange with berries, chocolate shards, and maybe a few amaretti cookies. Guests’ll lose their minds. (True story: I saw someone pocket three in a tuxedo jacket once.)
Mini Cannoli Cups don’t travel well when filled. Shells soften in the fridge. Store the filling and shells separately in airtight containers, then assemble on site. Worth the extra five minutes.

Conclusion
Mini Cannoli Cups bring all the cannoli flavour, none of the hassle. They’re quick, elegant, and endlessly adaptable. The buttery, flaky shell meets creamy, dreamy ricotta like it’s fate. And let’s be honest—they just look cute as hell on a plate.
Mini Cannoli Cups are a baker’s cheat code. No one knows how easy they are, and they never have to. Whether you’re catering, baking for a crowd, or just spoiling yourself on a Tuesday, these are the go-tos.
Mini Cannoli Cups troubleshooting? Got soggy shells? You filed too early. Filling too runny? Your ricotta wasn’t drained. Not sweet enough? Add a touch more sugar—but not too much, or it overpowers that ricotta tang.
Mini Cannoli Cups last tips: Always taste the filling before chilling. Your tongue knows what it wants. And if in doubt—add more chocolate chips. It never hurt anyone.
FAQs
Can I make Mini Cannoli Cups ahead of time?
Yes, but store shells and filling separately. Fill right before serving to keep that perfect crunch.
What’s the best way to drain ricotta?
Wrap in cheesecloth and place over a bowl with a weight on top (like a small plate). Leave it for at least 2–3 hours, or overnight for best results.
Can I freeze Mini Cannoli Cups?
The shells, yes. The filling, not really—it gets grainy. Freeze baked shells in an airtight container up to 2 months, then thaw and fill fresh.
Do I have to use mascarpone?
Nope, but it adds richness. Cream cheese works as a sub; just use full-fat and blend well to avoid lumps.
Why did my shells shrink or puff too much?
Probably overworked dough or oven too hot. Roll evenly and don’t press the crusts too hard into the muffin tin—just a gentle nudge.

Olivia P. is a seasoned food blogger at Tastywink, sharing delicious, easy-to-follow recipes inspired by him passion for home cooking. With years of culinary blogging experience, he brings flavor, creativity, and a personal touch to every dish.
