Chocolate Rice Krispie Balls Recipe is the kind of treat you make once, and somehow it keeps popping back into your life. I made these the first time on a rainy Thursday night when I was broke, cold, and needed something sweet that didn’t require an oven. The smell of melting chocolate and butter that night? It hooked me for life. And the crunch… that unapologetic, loud snap when you bite through the shell—oh, it’s dangerous.
Chocolate Rice Krispie Balls Recipe stands out because it’s ridiculously simple but can be elevated to a full-on gourmet dessert if you know what you’re doing. Think of it as a blank edible canvas: the base is humble, but the creativity is limitless. From fancy drizzles of tempered chocolate to hiding a salted caramel center inside, there’s a universe of tweaks just waiting.
Chocolate Rice Krispie Balls Recipe has no strict cultural origin, yet it’s a familiar comfort in kitchens across America, often appearing during holidays or at bake sales. Its appeal is primal—sweet, crunchy, chocolatey. And unlike delicate pastries that demand exact room temperatures or resting times, these forgive you for rushing them. You could make them with a toddler on one hip and still win dessert of the year.
Ingredients & Substitutions
Chocolate Rice Krispie Balls Recipe calls for unsalted butter, because you want to control the salt yourself. Salted butter can work in a pinch, but then you’ll skip extra salt or risk an over-salted bite. The butter’s richness is what makes the texture luxurious instead of dry.
Chocolate Rice Krispie Balls Recipe needs semi-sweet chocolate chips as your main coating. Milk chocolate can be sweeter and creamier, but can sometimes overpower the cereal’s light crunch. Dark chocolate—above 60% cacao—will give a deeper flavor for grown-up palates, but you’ll need to balance it with a touch more sugar in the filling.
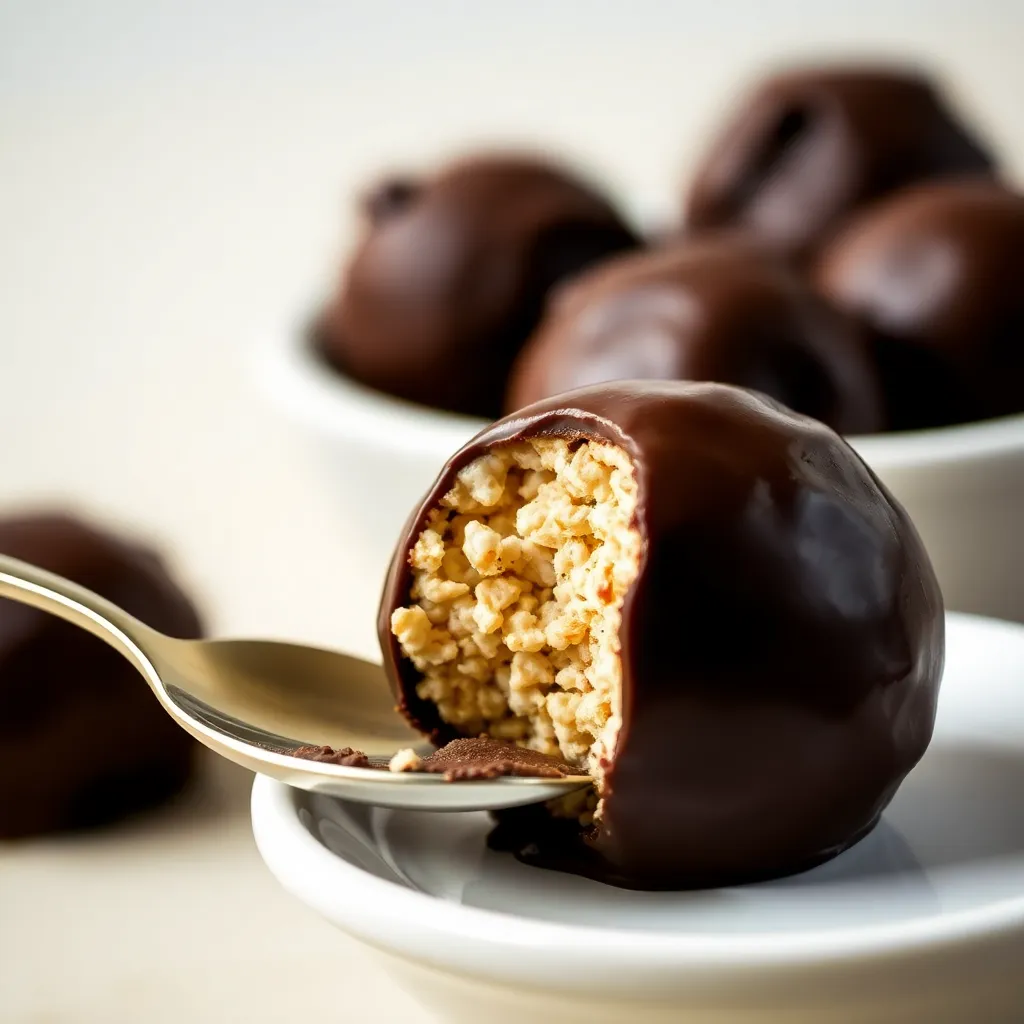
Chocolate Rice Krispie Balls Recipe is built on Rice Krispies cereal. But here’s the thing—generic puffed rice cereals can work too, though they may not have the same crisp integrity after mixing with chocolate. The key is to choose cereal that stays snappy, not soggy, once coated.
Chocolate Rice Krispie Balls Recipe filling starts with peanut butter—creamy, never chunky, if you want a perfectly smooth bite. Almond butter, sunflower seed butter, or tahini can sub in for allergy-friendly versions. Each brings a different flavor profile, so choose based on the crowd you’re feeding.
Chocolate Rice Krispie Balls Recipe benefits from a little powdered sugar in the filling. It’s not just for sweetness—it binds the peanut butter so it firms up, holding its shape instead of oozing out. Skip this and you’ll be rolling sticky chaos.
Step-by-Step Instructions
Chocolate Rice Krispie Balls Recipe begins with melting the butter and peanut butter together over low heat. Low is key—too high and you risk splitting the mixture, leaving you with oily streaks that won’t emulsify back. Stir constantly; it’s soothing, like stirring a pot of hot fudge on a lazy afternoon.
Chocolate Rice Krispie Balls Recipe moves on to adding powdered sugar. Do it gradually, sifting if you can, to avoid clumps. This is the moment you’ll see the mixture transform from glossy liquid to a malleable dough that rolls between your palms without sticking.
Chocolate Rice Krispie Balls Recipe’s shaping step is where most people rush. Chill the filling for at least 20 minutes before rolling—your hands won’t melt it, and the balls will be uniform instead of lopsided blobs. Roll each to about the size of a walnut; too big, and they’re messy to coat, too small, and they lose that satisfying bite.
Chocolate Rice Krispie Balls Recipe now gets the chocolate bath. Melt chocolate chips with a teaspoon of coconut oil for a silky coating. Without the oil, chocolate can seize or coat unevenly, especially if your kitchen runs cool.
Chocolate Rice Krispie Balls Recipe’s coating process works best with a fork instead of a spoon. Forks let excess chocolate drip off without leaving messy puddles. Work quickly; if the filling warms, the chocolate may slide off instead of clinging.
Chocolate Rice Krispie Balls Recipe needs resting time—set them on parchment paper until the coating hardens. You can speed it up in the fridge, but room temp cooling often keeps the chocolate’s snap sharper.
Cooking Techniques & Science
Chocolate Rice Krispie Balls Recipe relies on the emulsion between butter and peanut butter. Butter brings milk solids and fat, while peanut butter brings oils and proteins—together, they create a cohesive, creamy base. Too much heat breaks the emulsion, and you’ll taste it in the final texture.
Chocolate Rice Krispie Balls Recipe works because Rice Krispies have air pockets. Those pockets amplify the crunch and prevent the texture from going dense after mixing. If you crush the cereal accidentally, you lose that airy crunch and end up with something more like candy fudge.
Chocolate Rice Krispie Balls Recipe’s chocolate coating benefits from tempering if you want a pro finish. Tempering aligns the cocoa butter crystals so the chocolate sets glossy and firm at room temp. Without it, you might see bloom—those dull, white streaks—though it’s harmless, just less pretty.
Chocolate Rice Krispie Balls Recipe’s coconut oil in the coating is more than just gloss insurance. It lowers the chocolate’s viscosity, so it flows better around the filling, creating an even layer without thick clumps.
Chocolate Rice Krispie Balls Recipe doesn’t strictly require refrigeration, but storing them cool prolongs the crunch. Humidity is your enemy here; moisture softens puffed rice like it’s been left in milk.
Serving & Pairing Suggestions
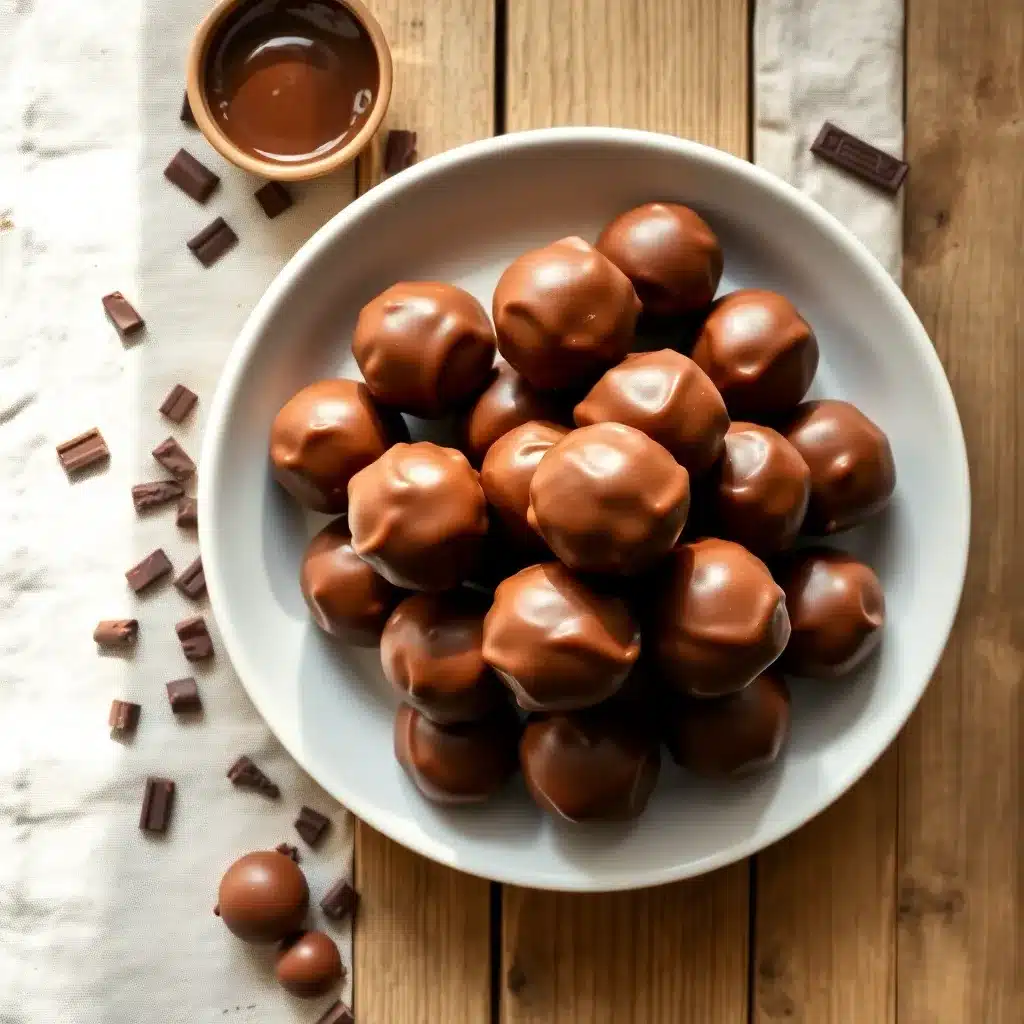
Chocolate Rice Krispie Balls Recipe is at its most tempting when piled high in a shallow bowl, the glossy surfaces catching the light. Sprinkle with crushed nuts or flaky sea salt right before the chocolate sets for a fancy finish.
Chocolate Rice Krispie Balls Recipe pairs beautifully with black coffee—bitter and bold to balance the sweetness. For kids, a cold glass of milk turns it into the ultimate after-school snack.
Chocolate Rice Krispie Balls Recipe can also be served as part of a dessert platter with fresh berries, shortbread cookies, and candied nuts. Their round shape adds a playful contrast to flat, crisp treats.
Chocolate Rice Krispie Balls Recipe travels well, so they’re a perfect choice for bake sales, picnics, or holiday tins. Just remember to separate layers with parchment paper to keep the coating intact.
Conclusion
Chocolate Rice Krispie Balls Recipe is one of those rare desserts that are just as satisfying to make as they are to eat. The simplicity invites beginners, while the endless customizations keep pros intrigued. The marriage of crispy cereal, creamy filling, and smooth chocolate coating? Pure alchemy.
Chocolate Rice Krispie Balls Recipe also has this nostalgic, cozy magic that transcends trends. In a world obsessed with elaborate desserts, it’s refreshing to find one that’s still allowed to be just… fun. No pressure, no perfectionism, just honest sweetness.
Chocolate Rice Krispie Balls Recipe should be on every baker’s list—not because it’s flashy, but because it’s the kind of treat that disappears before you even put the plate down. That’s the sign of a keeper.

FAQs
Can I make Chocolate Rice Krispie Balls Recipe without peanut butter?
Yes, you can substitute almond butter, sunflower seed butter, or even cookie butter for a nut-free or allergy-friendly version.
Why is my chocolate coating uneven?
Your filling might be too warm or your chocolate too thick. Chill the balls before dipping, and add a little coconut oil to thin the chocolate.
How long do Chocolate Rice Krispie Balls last?
Stored in an airtight container at cool room temperature, they last up to a week. In the fridge, they can keep two weeks, but the crunch may soften slightly.
Can I freeze Chocolate Rice Krispie Balls?
Yes, freeze them in a single layer, then transfer to a bag or container. Thaw at room temperature before serving to avoid condensation on the chocolate.
Do I have to temper the chocolate?
Not necessarily, but tempering gives a glossy finish and a firmer snap. If presentation matters, it’s worth the extra step.
