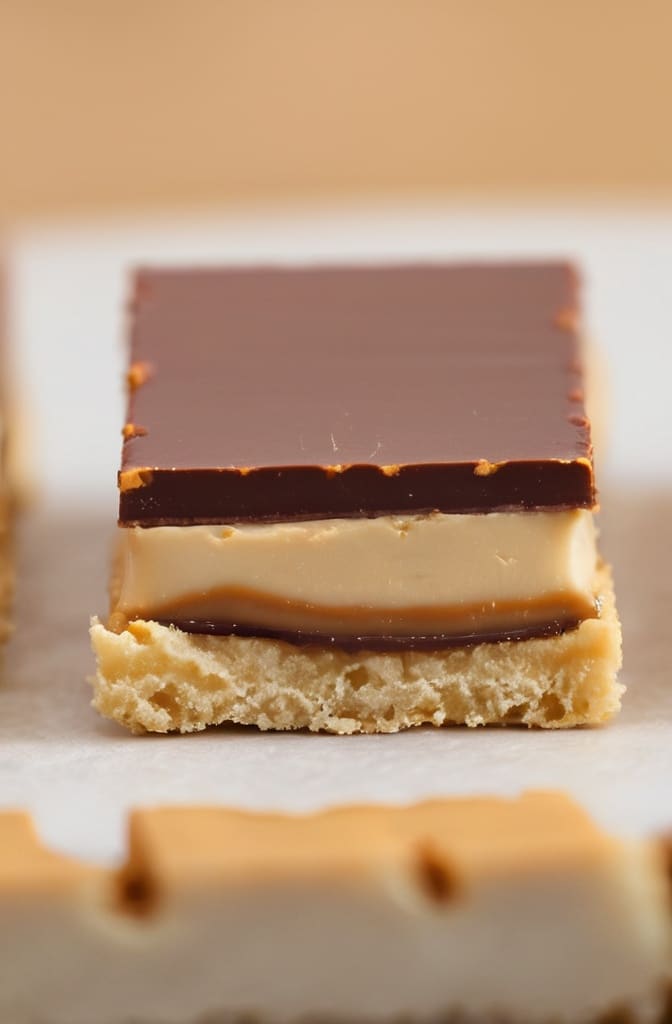
I remember biting into a Twix bar as a kid and thinking, How is this even legal? That crunch, sharp and butter, then the smooth, almost stretchy caramel, and finally that snappy chocolate. It was like three textures crashed into each other and made magic. Recreating that exact bite at home? Yeah, it sounds wild. But it’s not only possible—it’s better. Fresher. Warmer. Oozy in a way a factory bar could never even dream of.
Homemade Twix Bars are not just a copycat—they’re an upgrade. We’re talking a buttery shortbread base that doesn’t crumble like sand. Rich Caramelh, a lil’ chewy, not sickly sweet. And real chocolate that melts in your mouth, not the plasticky shell of the store-bought kind.
This isn’t your average DIY dessert. These bars teach patience, temperature control, and texture balance. You’ll learn how caramel behaves. You’ll temper chocolate without losing your mind (or your temper). Let’s dive into what makes these bars unforgettable and how you can pull them off without cursing out your kitchen halfway through.
Ingredients & Substitutions
Homemade Twix Bars need three clear layers: shortbread, caramel, and chocolate. Each one demands good ingredients, or the whole thing turns into a sticky, bland mess.
For the shortbread base:
- 1 cup (2 sticks) unsalted butter, softened
- 1/2 cup granulated sugar
- 2 cups all-purpose flour
- 1/4 teaspoon salt
- 1 teaspoon vanilla extract
Substitutions: No unsalted butter? Use salted, but cut the added salt. If you’re gluten-free, a 1-to-1 GF flour blend with xanthan gum works shockingly well. Coconut flour? Nah, don’t do it—texture goes weird.
For the caramel layer:
- 1 cup unsalted butter
- 1 cup brown sugar (packed)
- 4 tablespoons light corn syrup
- 1 can (14 oz) sweetened condensed milk
- Pinch of sea salt
Substitutions: You can substitute golden syrup for corn syrup if you’re in the UK. Want dairy-free? Use vegan butter and coconut condensed milk—texture holds, taste shifts slightly nutty. Avoid honey—it crystallises weirdly here.
For the chocolate topping:
- 12 oz high-quality semi-sweet or milk chocolate (bars > chips)
- 1 tablespoon coconut oil or neutral oil (optional, for shine)
Substitutions: Go dark chocolate if you like bitter. White chocolate? Sure, if you’re wild. Just don’t use cheap chocolate chips—they seize and melt all wrong.

Step-by-Step Instructions
Homemade Twix Bars need you to think in layers. Each one’s gotta be right before you move on. No rushing this.
Step 1: Make the shortbread base. Preheat your oven to 350°F (175°C). Line a 9×13″ pan with parchment—leave overhang to pull it out later. Don’t skip this.
Cream butter and sugar until fluffy and pale—about 2–3 minutes. Add vanilla. Then mix in flour and salt till it forms a soft dough. Press into the pan evenly. It’ll seem crumbly. That’s okay—just smush it down.
Bake for 20–25 minutes till edges are just barely golden. Not brown. Overbaking = dry base. Let cool fully before caramelising.
Step 2: Cook the caramel (carefully) Throw butter, brown sugar, corn syrup, and condensed milk in a heavy-bottomed pot. Medium heat. Stir constantly—wooden spoon or silicone spatula only.
Bring to a gentle boil. Bubbles like champagne, not a volcano. Stir for about 8–10 minutes till it thickens and deepens in colour. It’ll hit 225–230°F if you’ve got a candy thermometer.
If it smells nutty, pull it—too far and you’ve made toffee. Spread over the cooled shortbread. Smooth quickly. Let it set at room temp for 1–2 hours or chill 30 mins.
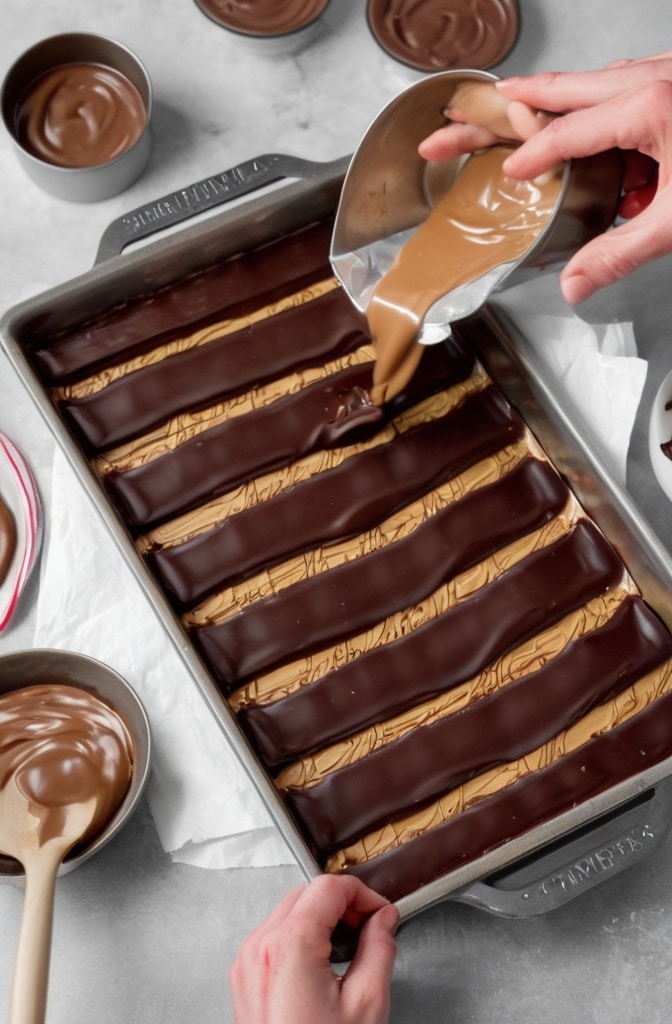
Step 3: Melt the chocolate and top Chop chocolate fine and melt in a heatproof bowl over simmering water (double boiler). Stir constantly. Add oil if you want gloss—optional but makes it look pro.
Pour melted chocolate over the set caramel. Smooth with an offset spatula. Tap the pan gently to remove bubbles. Chill for 1 hour minimum before slicing.
Step 4: Slice smart Use a hot knife (run it under warm water, wipe dry) to slice into bars. Clean between cuts. If chocolate cracks, it wasn’t fully set—or it was too cold. Let sit at room temp for 10 mins before slicing.
Cooking Techniques & Science
Homemade Twix Bars teach you more than you’d expect.
Shortbread science: Creaming butter traps air, giving the base lightness without rising agents. No eggs = snappier bite. You want the flour to hydrate just enough for cohesion, not chew. Overmixing forms gluten, which ruins the melt-in-mouth feel.
Caramel chemistry: This isn’t pourable caramel sauce. You’re cooking to softball stage (around 230°F), so the sugars stabilise into a chewy layer. The milk proteins in condensed milk caramelise and deepen flavour—basically, you’re halfway to dulce de leche.
Corn syrup prevents sugar crystals from forming. Skip it, and your caramel may get grainy or split.
Chocolate tempering (kinda): If you melt chocolate without overheating, and cool it right, it’ll snap clean. No need to temper fully unless you’re a purist. But avoid overheating—it’ll bloom (white streaks = sad chocolate).
Tools that help big time:
- Candy thermometer
- Offset spatula
- Parchment paper
- Heavy-bottomed saucepan
- Sharp knife
- Patience (not technically a tool, but… ya know)
Serving & Pairing Suggestions
Homemade Twix Bars are rich. Decadent. Almost over-the-top. Serve small pieces.
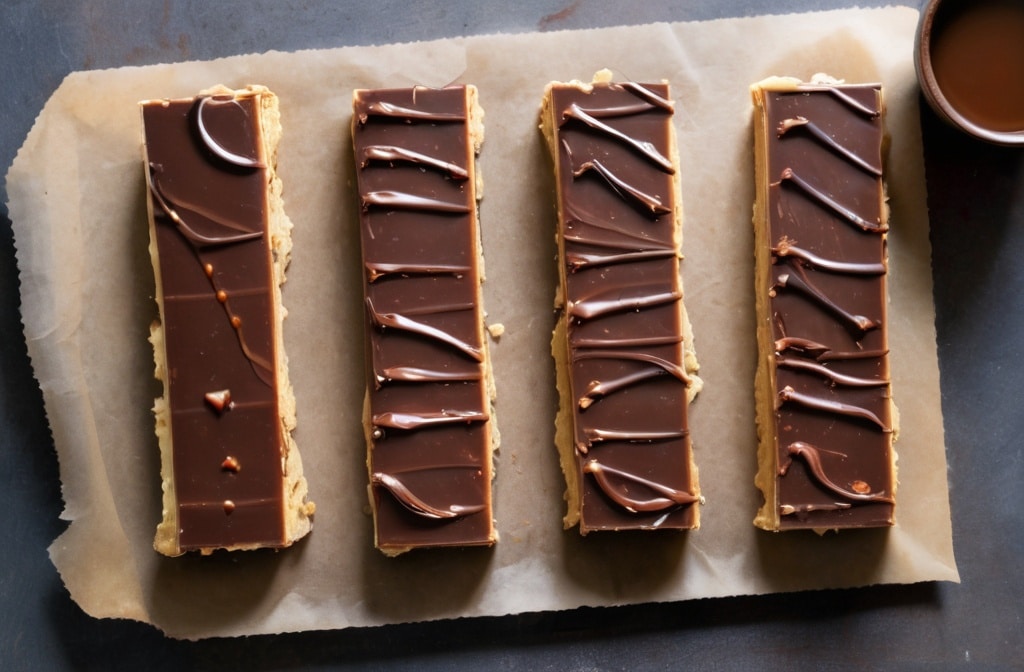
Cut into fingers, stack on a slate board, and dust with cocoa powder if you’re feeling extra. Add flaky salt on top of the chocolate for an elegant crunch. Or drizzle with extra dark chocolate in a zigzag for contrast.
Pair with bitter drinks to balance that sweetness—espresso shots, unsweetened matcha, or even a stout. Want full dessert vibes? Serve with vanilla ice cream and warm them slightly so the caramel oozes out like a dream.
These also travel well. Pack in wax paper, give as edible gifts, or sneak them into a movie night. They freeze beautifully, too—just let them thaw a bit before biting, unless you want dental regrets.

Conclusion
Homemade Twix Bars are what happens when you take a nostalgic favourite and give it a five-star pastry chef glow-up.
They’re not fast. They’re not exactly “easy” either. But they’re worth every minute. You control the sweetness, the texture, and the finish. You get real caramel. Real butter. Real chocolate. And that combination? Unbeatable.
If you mess them up, so what? They still taste ridiculous. And the second batch? It’ll be killer.
Keep practising. Taste everything. Trust your instincts. And don’t forget to lick the spoon.
FAQs
How long do homemade Twix bars last?
Stored in an airtight container at room temp, they’ll last 5–7 days. Refrigerated? Up to 2 weeks. Freeze them and you’ve got dessert on demand for 2–3 months.
Can I use store-bought caramel instead?
Sure. But know this—it won’t set the same. It may stay gooey or slide off. You’ll miss the deep, nutty notes from homemade caramel. Still tasty though.
Why is my chocolate topping cracking?
Two reasons: the chocolate was too cold or you cut it too soon. Let it rest at room temp before slicing. Use a hot knife to make clean cuts.
Can I make these gluten-free or vegan?
Yep. Use a GF flour blend for the base (look for xanthan gum). For vegans, swap in plant-based butter and coconut condensed milk. Use dairy-free chocolate. Texture shifts, but still solid.
What’s the best way to slice Twix bars cleanly?
Chill fully. Use a sharp knife heated under hot water, then dried. Wipe between each cut. Don’t rush—it’s not a race.

Olivia P. is a seasoned food blogger at Tastywink, sharing delicious, easy-to-follow recipes inspired by him passion for home cooking. With years of culinary blogging experience, he brings flavor, creativity, and a personal touch to every dish.
